After you have opened a form,
you probably want to work with the data you have bound it to. You most
likely want to move from record to record, edit data, add new records,
delete records, and copy records. The process of editing data includes
learning important techniques such as how to select records, delete
field contents, undo changes, search and replace, and more. The
following sections cover all these techniques.
1. Moving from Record to Record in a Form
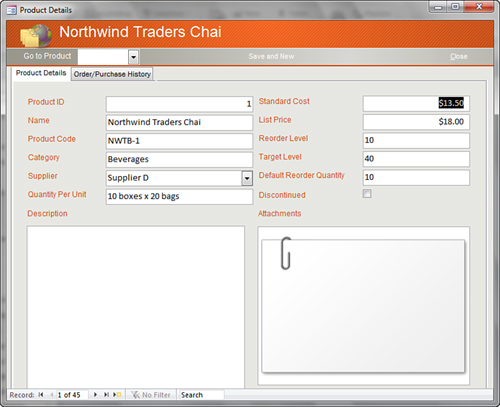
The Navigation Bar appears at the bottom of the Form tab (see Figure 1).
It allows you to move from record to record. The first button on the
Navigation Bar moves you to the first record in the form, and the second
button moves you to the record that precedes the record you’re
currently viewing. Between the second and third navigation button is a
record indicator. By typing a record number in the record indicator box,
you can quickly move to a desired record. To the right of the record
indicator are the next record button, the last record button, and the
new record button.

You can also you use keystrokes to move from record
to record. Pressing Page Down moves you forward through the records, one
record at a time. Pressing Page Up moves you backward through the
records, one record at a time. Pressing Ctrl+End moves you to the last
record, and pressing Ctrl+Home moves you to the first record. Finally,
Ctrl++ (plus sign) moves you to a new record.
Edit the Data Underlying a Form
You can modify the table data from within a form. For
example, you may want to change a customer’s company name or address.
Here’s how:
1. | Select the record you want to change by using any of the techniques covered in the previous section, “Moving from Record to Record in a Form.”
|
2. | Select the field you want to change by clicking the field or using the directional keys.
|
3. | Type to make the necessary changes to the data.
|
Delete Field Contents Within a Form
Now that you know how to modify the contents of a
field, let’s talk about how to delete the contents of a field. In
following along with this section, make sure that you understand that we
are not deleting records, we are simply deleting the contents of an
individual field within a record. You
would do this, for example, if you entered a region for a company and
then realized that it was located in a country that did not have
regions. The process is simple:
1. | Select the field contents you want to delete.
|
2. | Press the Delete key.
|
|
A couple of items are important to note. First, if
you press the Esc key twice, Access cancels all changes you made to that
record. Second, it is important to recognize that Access saves the
record you are working with as soon as you move off of it onto another
record.
|
2. Undoing Changes Made Within a Form
There are many times when you need to undo changes
that you made to a control or to a record. An example is when you
started making changes to the incorrect control, or even to the
incorrect record. Undo comes to the rescue! You have several different
options for how to do this, depending on whether you are still within a
control, have left the control, or have left the record. You can use the
Undo feature only to undo the last change made to a control or changes
made to the most recently modified record.
Undoing Changes Made to the Current Control
When
you are in the process of making changes to a field, you might realize
that you really didn’t want to make changes to that field or to that
record. To undo changes to the current control, you can either click the
Undo tool on the QuickAccess toolbar, select Edit, Undo Typing, or
press the Esc key once.
Undoing Changes After You Move to Another Control
The process of undoing changes after you move to
another control is from the same as the process of undoing changes made
to the current control. You can either click the Undo tool on the
QuickAccess toolbar or press the Esc key once.
|
It is important to understand that once you make
changes to more than one control in a record, you can only undo those
changes by undoing the changes to the entire record. This requires
select Undo twice on the QuickAccess toolbar.
|
Undoing Changes After You Save the Record
When you make changes to a field and then move to
another record, Access saves all changes to the modified record. So long
as you do not begin making changes to another record, you can still
undo the changes you made to the most recently modified record. To do
this, you can either click the Undo tool on the toolbar or press the Esc
key twice.
|
If Access is unable to undo a change, the Undo tool appears dimmed.
|
Use a Form to Add New Records to a Table
Access adds records to the end of a table, regardless
of how you add them to the table. To use a form to add new records to a
table:
1. | Click the New Record tool on the Navigation Bar at the bottom of the form.
|
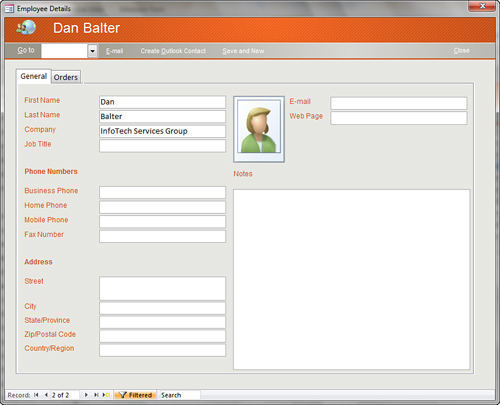
2. | Type the data for the new record (see Figure 2).

|
3. | Press Tab to go to the next control.
|
4. | Repeat steps 2 and 3 to enter all the data for the record.
|
5. | Press Tab to move to another new record. Access saves the record.
|
Access
always displays one blank record at the end of a table. This blank
record is ready to act as the new record. Also, you can press the Tab
key to add a record when you are on the last field of the last record in
the table.